An INI file is a configuration file for computer software that consists of a text-based content with a structure and syntax comprising key–value pairs for properties, and sections that organize the properties.
parse_ini_file function
Parse ini file is a function to parse any configuration file which has key-value pair This is required when you want to keep all application-level configuration parameters in one place Maintaining configuration level parameter/variables is easy when you use ini file You need to make changes in one file and it will reflect changes throughout the application
Composer is an application-level package manager for the PHP programming language that provides a standard format for managing dependencies of PHP software and required libraries. It was developed by Nils Adermann and Jordi Boggiano in 2012, who continue to manage the project.
cd ~
curl -sS https://getcomposer.org/installer -o composer-setup.php

sudo php composer-setup.php --install-dir=/usr/bin --filename=composer

OR

sudo php composer-setup.php --install-dir=/usr/local/bin --filename=composer
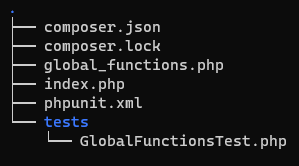
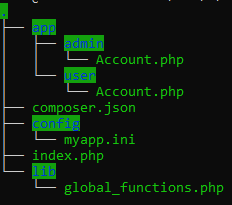
composer.json Keep this file in the project’s root directory NOTE: This file is mandatory to in root directory to use composer as composer look for this file when you run dump-autoload
<?php
namespace App\Admin;

class Account {
	//this is magic method as it will invoked automatically
        //when you create instance of account
	public function __construct() {

		echo "I am from Admin Account" . PHP_EOL;
	}
}
app/user/Account.php
<?php
namespace App\User;

class Account {
	//this is magic method as it will invoked automatically
	//when you create instance of account
	public function __construct() {
		echo "I am from User Account" . PHP_EOL;
	}
}
A user or admin facing problem managing data on excel sheet. He/She need a system to perform at least following operations
Add Record
Modify Record
Delete Record
Show Listing and Search Data to get specific Information.
User need a system which should be accessible from internet so that he can work from any machine (laptop/desktop/mobile).
You need to develop a web application with best of your knowledge
Roles: Admin
With correct credentials admin should be able to login and see the dashboard.
if credentials are wrong he will stay on login page and show a message – wrong credentials.
On successful login admin can see users list perform all CRUDL operations.
NOTE: you need to use vim editor to edit files
Following are the wireframes for reference.
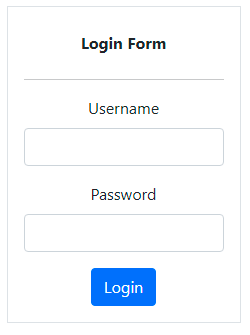
login.php
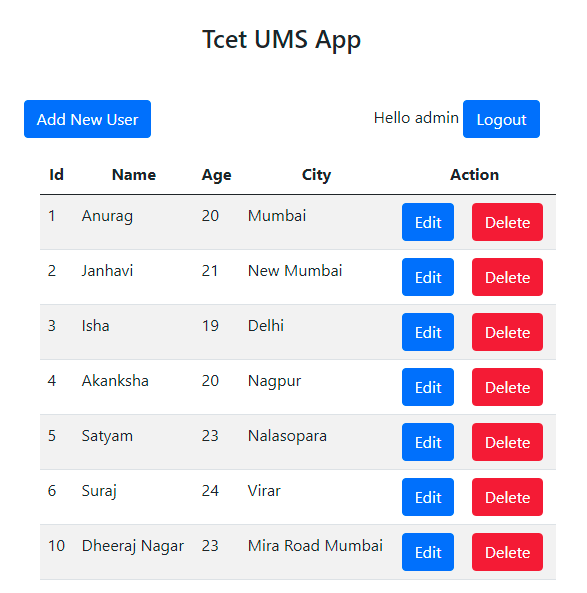
dashboard.php
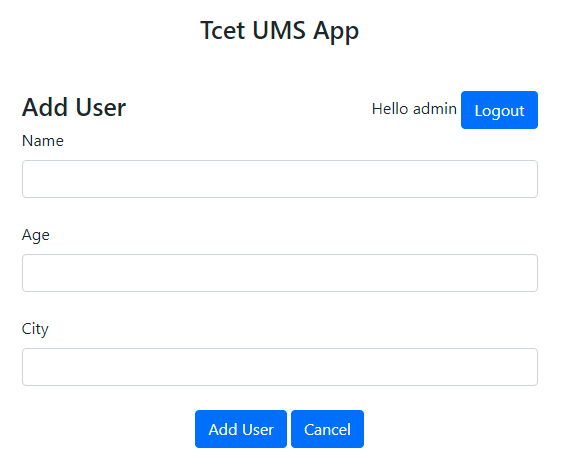
add_user.php
edit_user.php
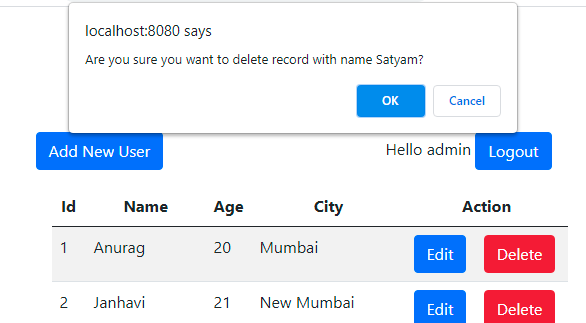
delete confirm box
Technologies to be used
composer for package management and autoload
ini for configuration
git and gitlab for version control
HTML5 CSS3 Bootstrap 5 for UI/UX
jquery 3.6 or javascript for validation and AJAX
php 7.4 or 8 as backend programming language
mysql 8 database
PDO for database operations
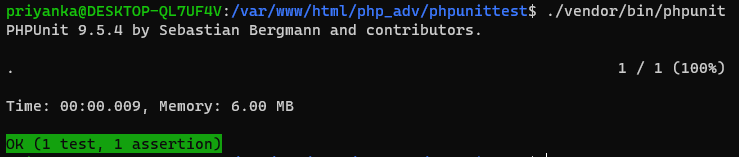
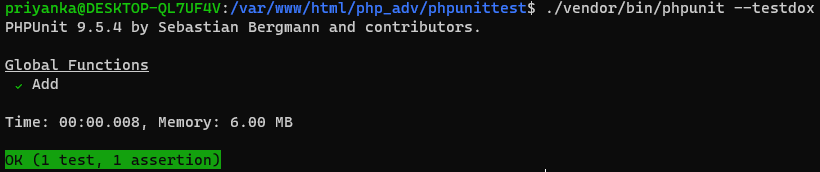
PHPUnit for unit testing
python and php for automation script (Use cron jobs to automatically run script)
nginx web server
use infinityfree / webserver / cloudserver for website hosting
Jenkins and git-ftp for CI/CD
MVP / Deliverable
P0
Users Listing
Delete User Record
Add User Record with Profile Picture (User status should be enum in database table: enable, disable, blocked, active, inactive)
Update User Record
Session Management Login / Logout
P1
View User Details in Modal Window
Pagination
Sorting
Searching
Filtering
P2
Frontend – Backend Validation
Export CSV Users
Bulk Upload CSV
Activity Log
Export Activity Log
P3
Login with OTP i.e. 2FA (Use Redis to store OTP)
Login Logout for user account
Inactive User status if not logged in for 3 consecutive days
Change Admin and User Password from their respective account
Secret Questions and Forgot Password / Recover Password using secret questions or through the email link
P4
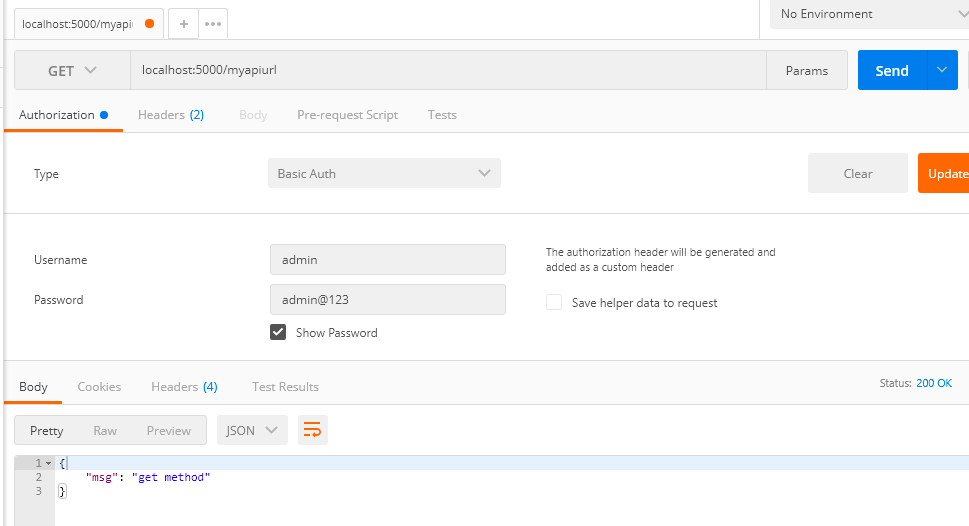
REST API (Web Services) for User CRUDL Operations
Protect REST API using Basic Authentication or JWT token
Login with google API or Facebook API
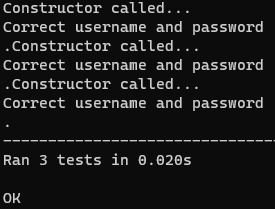
PHPUnit test for all functionalities
Licensing or limit user registration
P5
Dashboard showing following summary (Use highcharts)
Total User
Active Users
License Count / Usage Count
Online Users
Weekly Registration Stats
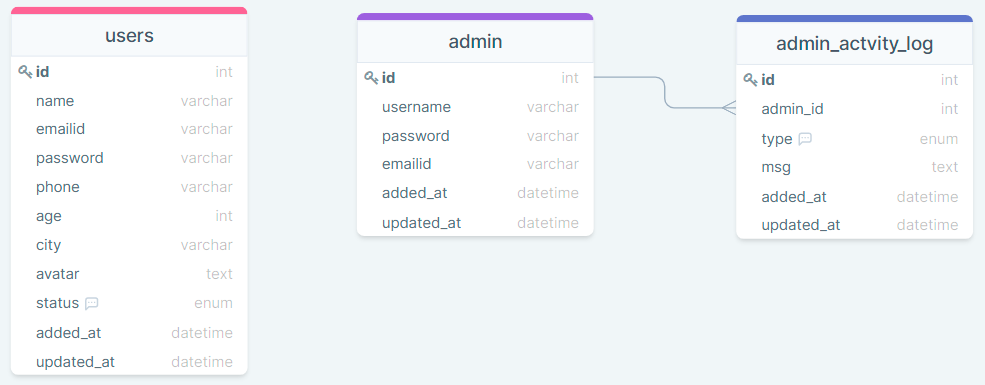
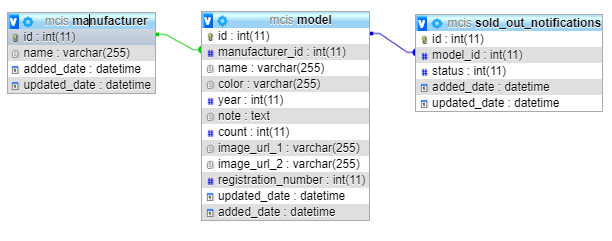
Schema
Ref SQL Queries
SELECT * FROM users ORDER BY id DESC;

SELECT * FROM users WHERE id = 3;

DELETE FROM users WHERE id = 3;

INSERT INTO users (id, name, age, city, added_at, updated_at) VALUES (NULL, 'sonam gupta', 18, 'gorakhpur', NOW(), NOW());

UPDATE users SET name = 'Sonam Gupta', age = 20, city = 'Gorakhpur', updated_at = NOW() WHERE id = 5;
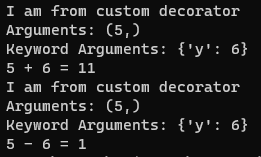
Keyword arguments (or named arguments) are values that, when passed into a function, are identifiable by specific parameter names. A keyword argument is preceded by a parameter and the assignment operator, = . Keyword arguments can be likened to dictionaries in that they map a value to a keyword.
A decorator is a design pattern in Python that allows a user to add new functionality to an existing object without modifying its structure. Decorators are usually called before the definition of a function you want to decorate.
Flask is a micro web framework written in Python. It is classified as a microframework because it does not require particular tools or libraries. It has no database abstraction layer, form validation, or any other components where pre-existing third-party libraries provide common functions.
install flask module
python -m pip install Flask
hello world
from flask import Flask, jsonify, request, render_template

app = Flask(__name__)

#YOUR FUNCTIONS HERE

if __name__ == "__main__":
    app.run(debug=True);
    #app.run(host="0.0.0.0", port=int("1234"), debug=True)
render html template [NOTE: MAKE SURE TO KEEP ALL TEMPLATE FILES IN templates DIRECTORY]
@app.route('/')
def index():
    #return "Hello World";

    data = {'company_name': "TCET"}
    return render_template('hello_world.html', data = data)
templates/hello_world.html
<h1>Hello World</h1>
<h3>Welcome to {{data['company_name']}}</h3>
from flask import Flask, jsonify, request
from flask_cors import CORS
import pymysql

app = Flask(__name__)
cors = CORS(app)

@app.route('/users', methods=['GET'])
def get_users():
    # To connect MySQL database
    conn = pymysql.connect(host='localhost', user='root', password = "", db='databasename')

    cur = conn.cursor()
    cur.execute("select * from users LIMIT 10")
    output = cur.fetchall()

    print(type(output)); #this will print tuple

    for rec in output:
        print(rec);

    # To close the connection
    conn.close()

    return jsonify(output);
Creating a personal mini car inventory system from scratch using your best knowledge and skills. The system will have inventory of manufacturer and models (cars) of each manufacturer owned.
System should be created using your own frontend and backend framework and should use caching.
Frontend should be a webapp a.k.a. SPA. (Ie: no refreshing/reloading pages)
Technology to be used:
PHP (OOP) MySql (Normalized Database Schema) Javascript (JQuery – AJAX) HTML, CSS and Bootstrap 5
Classes to be created:
Database – Class to deal with each and every operation of database. Manufacturer – Class to deal with all operations related to car manufacturer. Model – Class to deal with all operations related to car model.
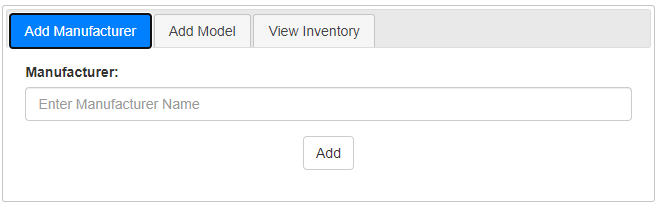
Page 1: Add Manufacturer. The page should contain a input box for manufacturer name and a submit button.
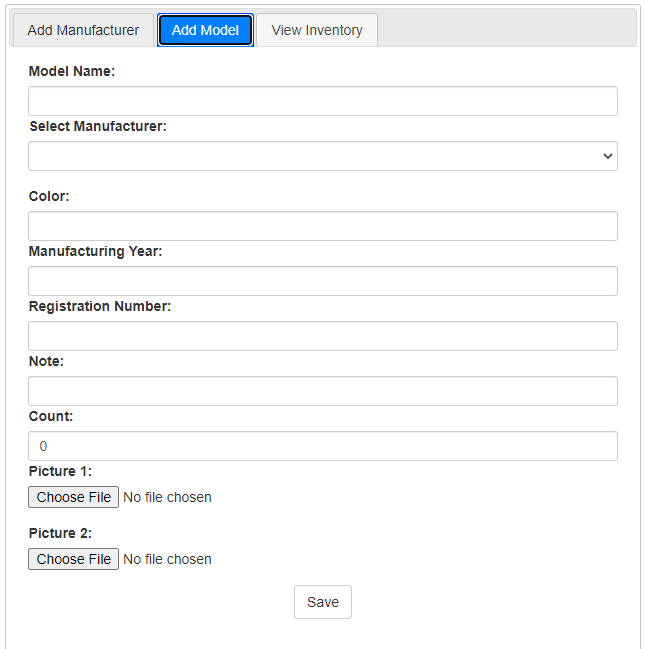
Page 2: Add Model. This page should have a manufacturer dropdown on the right side and model name textbox on the left side (Both should be in the same line)
Add other details below about the car like “Color, manufacturing year, registration number, note and 2 pictures”. Pictures should be uploaded using any ajax plugin.
And lastly there should be a submit button.
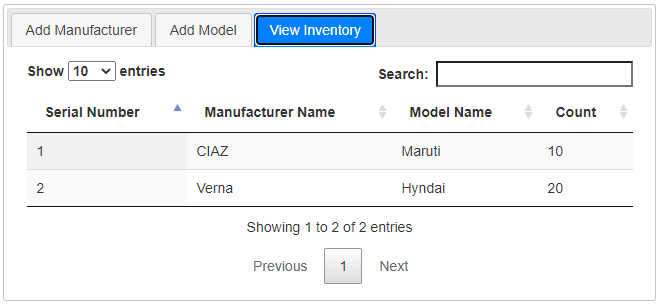
Page 3: View Inventory. This page should populate a table of all the models and manufacturers from the DB.
It should have the columns as below
Serial Number, Manufacturer Name, Model Name, Count
eg.
Maruti WagonR 2
Tata Nano 1
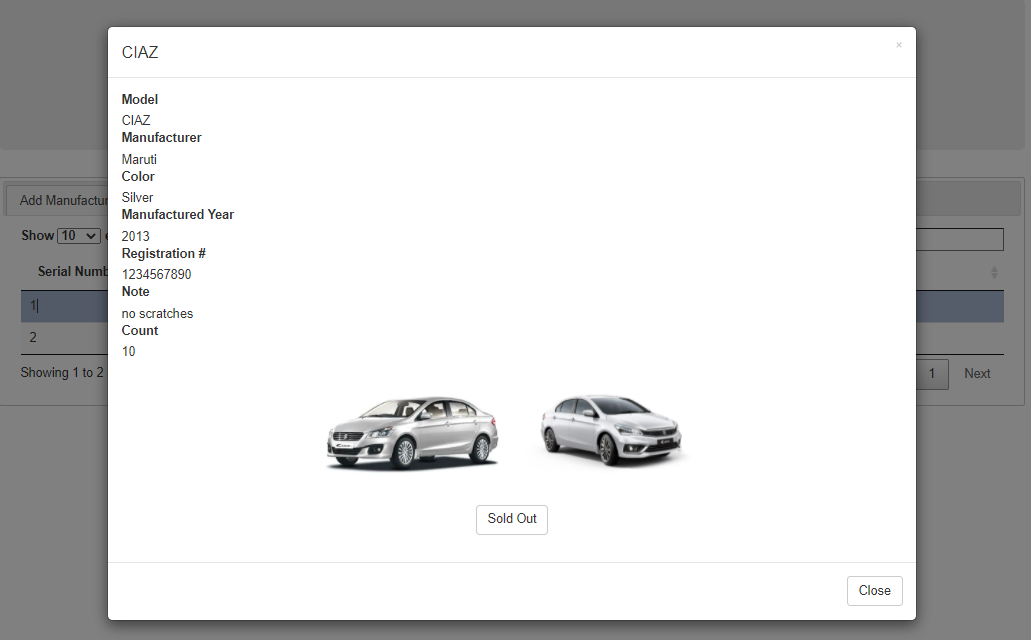
On clicking on the row, a popup will appear which will have details of the individual models like color, manufacturing year etc. (Basically all details from page 2) and a Sold clickable link.
On clicking Sold, the row will be deleted and the DB will be updated accordingly.
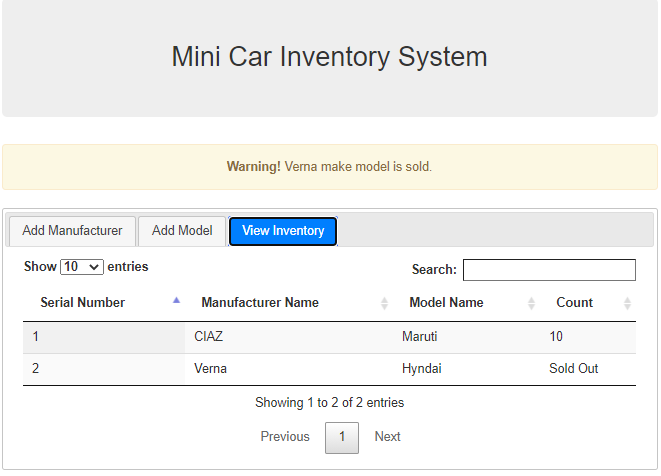
In addition to this, on Page 3 when users are viewing the inventory and in case a car is sold, the View Inventory table for the column Count will have to be dynamically updated in case a car is sold at that moment.
Similarly in case the users are on any other page or pop up of the system, they should get an alert saying “make model is sold” when a car is sold.