Redis Playground
https://try.redis.io/
Note: This try redis io is community version on web so few commands might not work. To use redis’s full power you can download and install on your local system
Redis is an in-memory data structure store, used as a distributed, in-memory key–value database, cache and message broker, with optional durability. Redis supports different kinds of abstract data structures, such as strings, lists, maps, sets, sorted sets, HyperLogLogs, bitmaps, streams, and spatial indices.
Installation
To install redis on windows download msi package from here
https://github.com/microsoftarchive/redis/releases/
For Linux Distr
sudo apt-get install redis-server
To install PHPRedis client use following command
sudo apt-get install php-redis
#for specific version
sudo apt-get install php7.4-redis
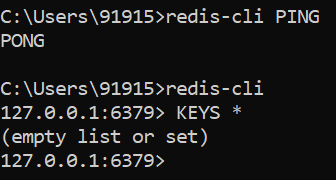
To verify redis installed in your system
Note: On windows you might need to add redis exe path in environment variables
redis-cli PING
To see all keys
KEYS *
DATATYPES
- string
- list
- set
- sorted set
- hash
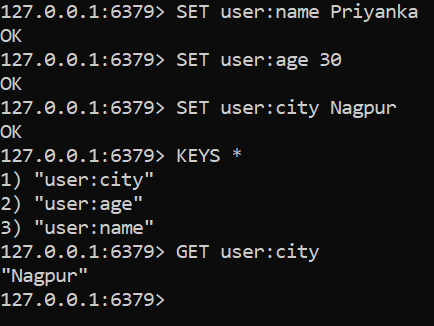
- String
Syntax to set string value
SET key value [EX seconds] [PX milliseconds] [NX|XX]
To set only string value
SET keyname value
To check whether key exist or not
EXISTS keyname
Get key’s value
GET keyname
To delete any specific key
DEL keyname
To delete all keys
FLUSHALL
SET string with expiry
SET key value
EXPIRE key expiry-time-in-seconds
#shortcut
SET key value EX expiry-time-in-seconds
To check expiry time of any key
TTL key
SET string values using key:spaces
This is required when you want to set values related to one entity
SET key:space value
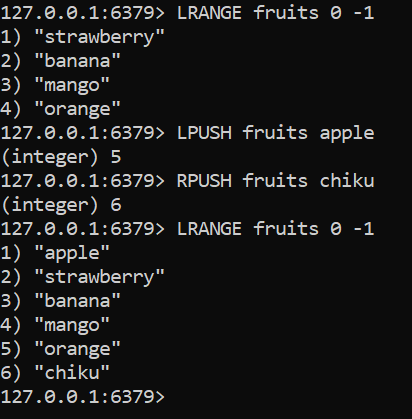
2. List or Stack
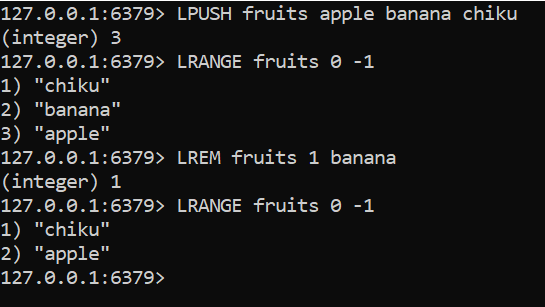
To set list use LPUSH
LPUSH key value1
LPUSH key value2
LPUSH key value3
OR
LPUSH key value1 value2 value3
To get length of list
LLEN key
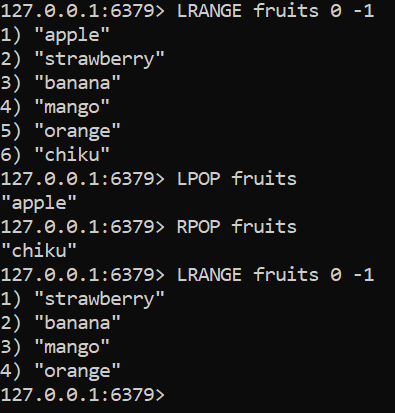
To access any value of list you need to use LRANGE
LRANGE key from-index to-index
Use -1 in to-value to get all elements from list
LRANGE key 0 -1
To get specific index value
NOTE this will act like stack so LIFO algorithm will apply here i.e. index 0 will give you last inserted/pushed value
LINDEX key 0
LPUSH and RPUSH (left and right push)
LPUSH key value
RPUSH key value
LPOP and RPOP
LPOP key
RPOP key
Remove specific element from list
LREM key count value
3. Sets
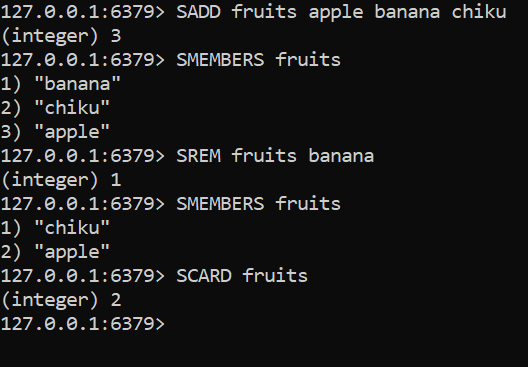
Set is similar to list the main difference is it does not allow duplicate members
Order is not maintained in set
To add member in sets
SADD key value1 value2 value3
To view members of sets
SMEMBERS key
To remove member from sets
SREM key member
To get length of Sets
SCARD key
Compare Sets
SINTER set1 set2
SDIFF set1 set2
SUNION set1 set2
4. Sorted Sets
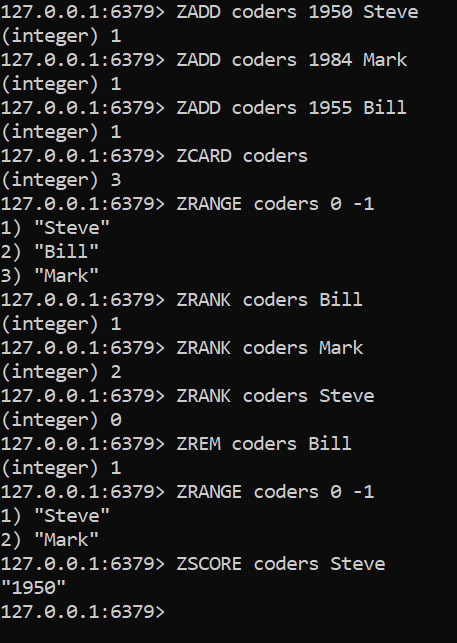
Sorted set are similar to sets the major difference is it stored members based on score i.e. sorted by score
ZADD key score member
To add multiple members
ZADD key rank1 member1 rank2 member2
To get count of sorted sets
ZCOUNT key
To See all members of sorted sets
ZRANGE key 0 -1
To get rank(index) of specific member
ZRANK key member
To get score of specific member
ZSCORE key member
To remove member from sorted sets
ZREM key member
5. Hashes
Hash is used to set field value pair it is similar to associative array
To set hash
HGET key field1 value1
HGET key field2 value2
To get field value
HGET key field
To get all field values
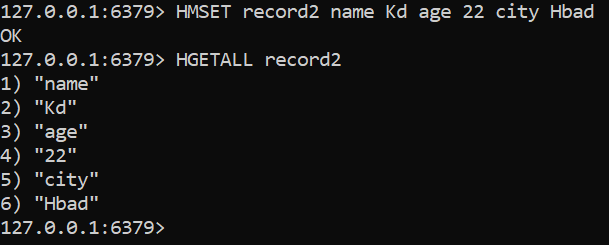
HGETALL key
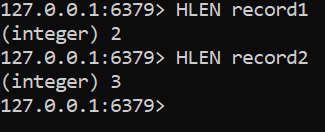
To get length of hash key
HLEN key
To add field values at once
HMSET key field1 value1 field2 value2 field3 value3
To get values at once
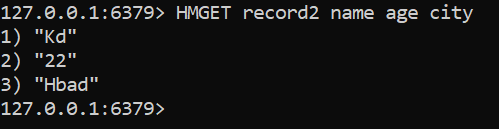
HMGET key field1 field2 field2
To delete specific field from hash
HDEL key field1 field2
Assignment (set and get values of each type)
- Create string name age and city and set value in it
- Create List of fruits, weekdays, planets and set values in it
Print length and values of list - Create Sets of employees and managers
Print length and values of Sets - Create Hash record1, record2, record3 and add fields name age city in each hash
Print length and values of each hash
Reference Links